For a bass-boosted party, a subwoofer is mandatory.
What if you got no subwoofer and you can’t buy one right now. Plus, you don’t know how to build one. Been there done that! And it can be a pretty helpless situation.
So, how can you build a DIY outdoor subwoofer then?
First, you need to grab some basic tools and subwoofer parts like wire, amplifier, and speaker. Next, you need to build the frame and put all the internal components inside. Remember to connect all the wires carefully. Finally, you can apply some finish as well on the box.
This was just an overview of the whole process. To successfully make a subwoofer, you will need more precise Info.
Thus I present to you this article! Once you go through it, you will know the process properly.
Let’s drop the beat and raise the roof!
Steps for Building DIY Outdoor Subwoofer
Although you can easily buy the best outdoor subwoofers, sometimes it becomes necessary to build a subwoofer.
After all, there are some significant differences between a DIY and a ready-made one!
Plus, building an outdoor ground subwoofer is not that hard. Maintain a few steps and that’s it!
Step 01: Grab Your Equipment
You can’t start any manufacturing without equipment, can you?
So, before starting to build up the subwoofer for your soundbox, let’s gather the equipment.
Relax! You don’t need to do some voodoo stuff to build the subwoofer. After all, it’s DIY. Not any military-grade subwoofer!
Here’s the list of things you will need:
- Wood (Make sure it’s MDF board and preferably Bright Creations MDF Board. The package is perfect to make a subwoofer and has no leftovers)
- Adhesives (wood glue or construction glue. I use Elmer’s wood glue while experimenting with woods.)
- Woodcutting machine (Hacksaw or table saw any would do. I would recommend choosing the CRAFTSMAN Hand Saw because it’s the most reliable brand out there)
- Paint ( Make sure you use the color that compliments your whole setup. In that case you can choose Caliart Acrylic Paint Set which includes 24 colors altogether)
- Minwax Clear Polycrylic Water-Based Protective Finish to top the subwoofer off.
- A pipe.
- BLACK+DECKER 20V MAX* POWERECONNECT Cordless Drill/Driver to drill for ports.
- Sound insulation material such as fiberglass.
- A speaker ( Depends on the whole setup)
- An amplifier ( Depends on the output that you expect)
- The necessary amount of cables.
- Scales, pencils, etc.
Most of these items are easily available in the market to buy. You can buy them at a reasonable price.
Or, you may even find out some of them are left in your basement!
Step 02: Time to Build the Box
Alright! Since our equipment is ready, it’s time to work. The first thing that we’re going to make is the mainframe, the box of the subwoofer.
This contains two portions. One is the inside box and the other one is the outside box. Let’s get into the inner box-
The Inner Box
This is the inside part of the subwoofer that has to be built first. To do so-
- First, take some wood, and cut them to the required shape of your subwoofer box. The cutting can be done by a hacksaw or table saw.
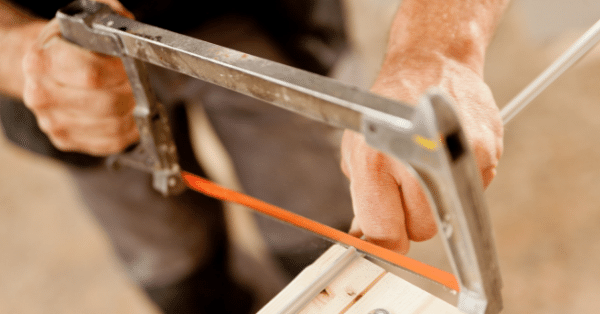
Source: The Tool Square
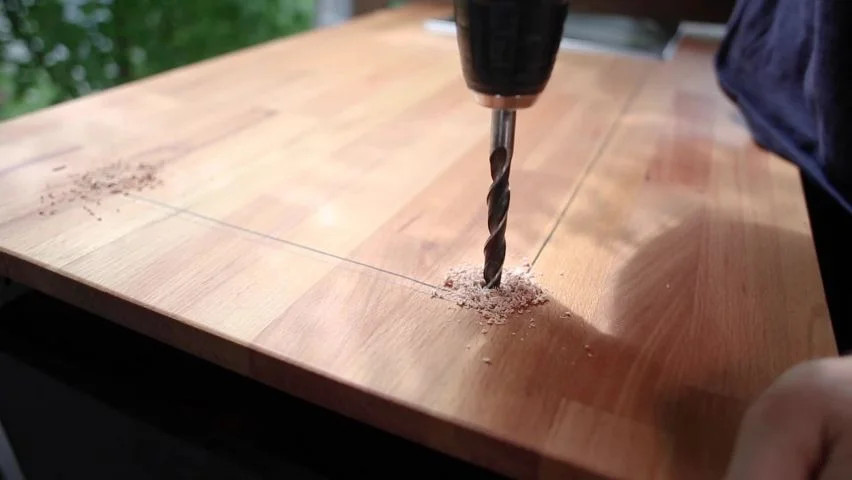
- Take a piece of wood. Drill the sections for ports. These portions will work as the frame for the port inside the subwoofer.
- After making the port, you have to build the brace. Take a piece of wood and draw the necessary sketches. Then cut along the sketch.
- Take another piece of wood and cut a square-shaped hole. This wood will typically stay at the backside of the subwoofer, along with the speaker.
- Now, it’s time to make the slot of the subwoofer. Take another piece of wood that you will use as the front panel. Simply take the cutter and cut a circular shape slot.
- Again take the front panel and cut a hole for the ports.
- Now assemble the woods. Gather the wood panels to build a box. Set the port inside the wooden box and then the brace.
- For binding, you can use either industrial adhesive. Or wood adhesives.
- Once you are done with the glue, leave the box out to dry. Use supports to hold the box in the right shape. Usually, in one night the glue will get dried.
This is how the inner box of the subwoofer is made.
The Outer Box
The outer box is the second layer of the subwoofer. Generally, it’s similar to the process of making the inner box. Just-
- Take some woods. Again cut and get wood panels out of them.
- Now put the wood panels around the inner box. Use glues to add the wood panels. Don’t forget to use supports to hold the box while the glue dries.
- Once you put the outer woods, they will cover up the holes of the inner box.
So, draw a sketch of the holes of the port, subwoofer, and the speaker.
- Thus, after drying the glue, take the box. Drill along with the sketches.
There goes the outer box. And once you are done with this, your box for the subwoofer will look more or less like this.

Source: Instructables
Step 03: Finishing
It is not a necessary step. Still, if you want your subwoofer to look a bit cooler then the finishing is necessary.
Paint the box with your favorite color and then polish it. This will make the subwoofer look aesthetically pleasing. Here’s a work-in-progress polished subwoofer box.
How you want to give finishing to your subwoofer simply depends on you. Since there are different structures of DIY subwoofers out there!
From my own experience, I’ve seen people using these two wood polishes in general. You can try any of them out if you gather the courage to trust me. Which I don’t think will be much problematic.
| Image | Product Name | Price |
|---|---|---|
 | Howard Products Feed-N-Wax Wood Polish & Conditioner | Check Current Price |
 | Weiman Furniture Polish & Wood Cleaner Spray | Check Current Price |
Step 04: Assemble The Components
Now, you are done with the box. Also, you got the subwoofer, amplifier, speaker, and other necessary components.
What are we waiting for then? It’s time to assemble them!
Firstly the speaker, Grab the box and put the speaker in the squared hole at the back panel of the box. Drill in the bolts to set the speaker up.
Now, take the subwoofer. Connect the amplifiers with the subwoofer carefully. Then set the subwoofer on the front panel of the box.
Next, set the wires and port inside the subwoofer box. Ensure that the ports are out of the port slot of the box.
Put some sound insulation material inside the box. This enhances the acoustic quality of the sound.
Thus, the assembly is done, and your outdoor subwoofer is ready to use. The whole thing should be looking more or less the same as this one.
Some Things to Keep In Mind
By this far, you know how to build a subwoofer. Still, there are some loose ends that you must keep in mind.
Give proper finishing to the edge, joints, and slots you cut on the box. Leave no sharp or unnecessary edges. This can damage the wires or the components.
Use protective gear while using the table cutter. Also, while using glue, wear gloves and safety goggles.
While coloring the box, wear a protective mask. Lest you might want to end up breathing toxic chemicals.
There you go. Keep these safety factors in mind. Perhaps, you won’t see the speakers making popping noises after this!
FAQs
Why Do I Need to Use Industrial Glue?
Simply stated, when you can’t use the wood glue. What adhesive you should use simply depends on what type of material you got. You can’t stick some materials using wood glue. Colored wood is an example of such material. Thus, you will need industrial glue. It is stronger than wood glue.
Why Are Holes Made at The Brace?
To reduce the internal sound of the box. The braces inside the subwoofer are drilled with holes. As a result, the number of materials inside the box gets reduced. When the sound is generated, it does not get obstructed. No echo gets developed. Besides, the holes reduce the weight of the subwoofer.
Is The Cylindrical Subwoofer Same as The Box Subwoofer?
Yes. The main difference is the shape of the subwoofer. The making of the cylindrical subwoofer is just the same as the rectangular one. All you have to do is cut the wood panels of cylindrical shape. Another thing you will need is some fabric clothes and foams. They can boost up the bass for you.
Final Symphony
Guess it ends here! By this far, you know how to build a DIY outdoor subwoofer.
Still, if you are nervous, then don’t! Just ask some speaker expert for pro tips and tricks.
I should be going.
Can’t wait to hear the bass of my self-made subwoofer!